Well hello! Hope you had a great weekend! I didn't accomplish much -- my Dad and I were busy on Friday working on this project and I pooped out after that. I've been a mess the past few weeks! About three weeks ago I had blood drawn and they got my nerve -- so for weeks now when I move my hand or arm a certain way I get a jolt. It's pleasant. ;)
Then this weekend I've felt like crap (I think the past few weeks have caught up with me) and this morning I smashed three fingers in a door. So. I haven't gotten much done in the past few days but I'm on the mend.
I am so excited about this bathroom! It's turning out just as I envisioned and it's been a blast to work on. It's been about eight weeks since I got a wild hair and knocked a wall out and I'm ready to get this thing wrapped up! I love that my Dad and I worked on a project for this room together. :)
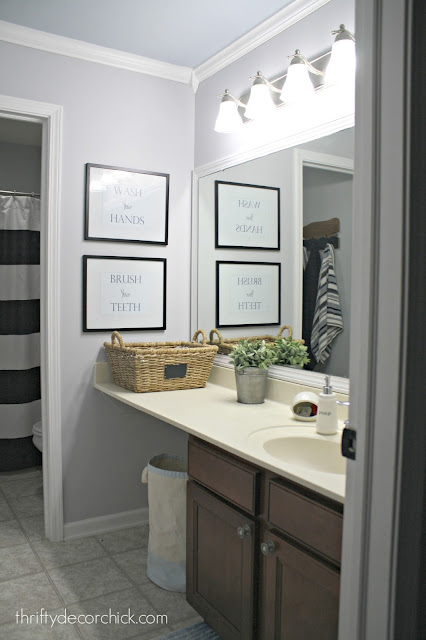
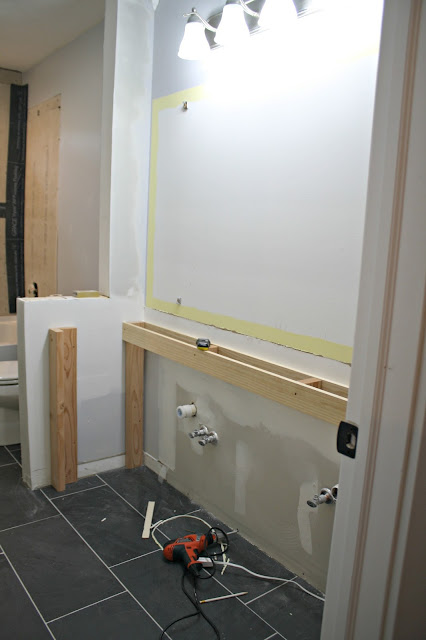
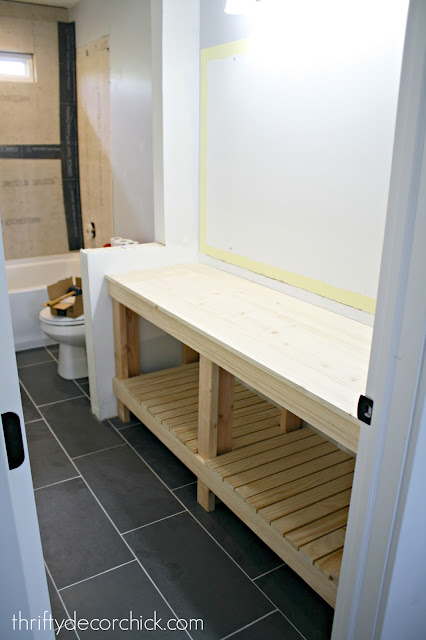
Friday we built the open vanity and it's going to be awesome -- it's close to done! Here's a reminder of where we started:
When we built the house we only had one sink put in. We must have been at the end of the finishes, the numbers were adding up and perhaps I was starting to freak out? I did that often at the end of our picks. ;) I don't know why we would have done one sink otherwise.
When I'm working on making over rooms in our house I'm always reworking them for how we live specifically, but I always have resale in mind. We have no plans of moving for a long time but I want to create the most value possible.
So we had another sink added in the bathroom weeks ago and I'm really excited about that. I knew long ago that I would build the vanity just because the store bought versions are SO expensive. Have you ever priced one out? A basic one in the 72 inch size we need is at the very least $800. For our master I'd be willing to spend on that, but in this bathroom we can go a little more casual.
My plan all along was to match the look of the DIY potting bench my Dad and I built years ago. It was surprisingly easy to build and I knew that look would be great in here.
Because we had the three walls to work with, we decided to built it in instead of building a freestanding version. With plumbing I didn't want it moving at all. We used 4x4's for the legs on the bench outside but I felt like that was going to get heavy in here, so instead we went with 2x4's. The back bracket was screwed into the first set of legs and then the studs:
Yes, I should have painted that back wall first, but Dad was available to do this quicker than I thought, so I didn't have time. I'll be able to do it before I get the plumbing finished up (I'll explain that more in a bit).
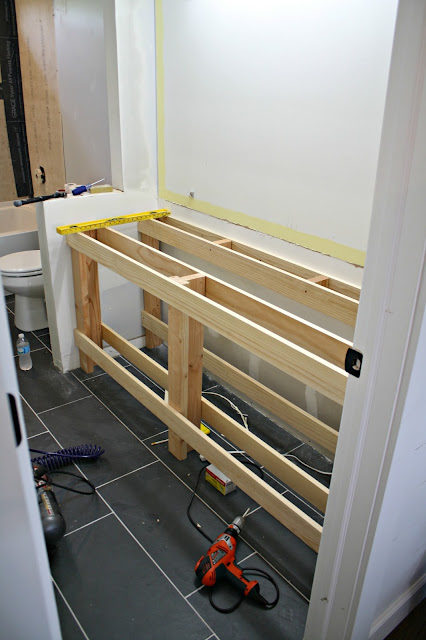
We added support with another 1x4 on the back and made the front legs more of an "L" shape for more support and made sure they were the exact same distance from the back wall:
Because of the width we added a middle support (and I later added one to the back). More 1x4's along the bottom to make everything sturdy and allow for the shelf:
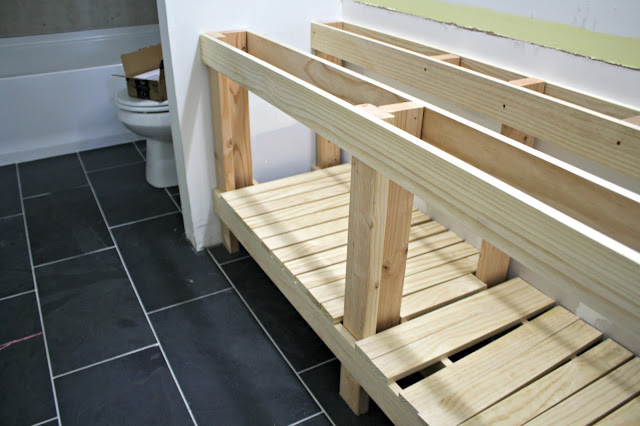
One by threes make the shelf for the bottom:
Once those are installed (they aren't yet) -- they will make this whole piece even sturdier!
And a large piece of wood finishes off the top:
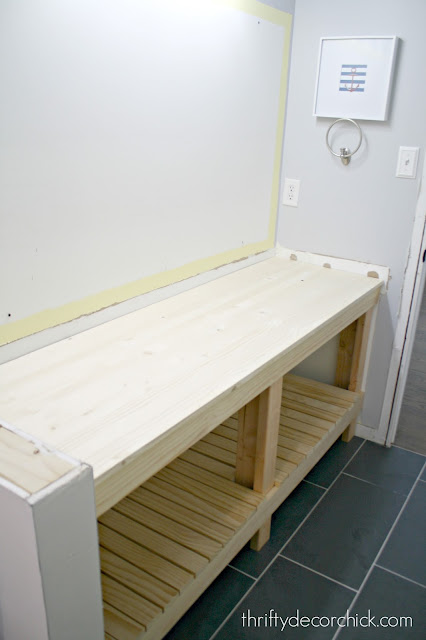
See? It's so much easier than it seems it would be! We used screws (for the supportive parts) and the nail gun (for the front pieces). I have not attached the slats for the shelving just yet because I plan to stain this and will have to do that before I install them.
It will have a more rustic look and because everything is pine I'm hoping they will all stain up the same. I have a plan in place if they don't. :)
I still have to add baseboards around the back of the vanity (again, didn't do it because of time), cut down the end pieces for the shelf (I have to notch those out with a jigsaw) and then I can start staining. As I've mentioned before, you can absolutely stain before you put the piece together, but I often find that you need to make tweaks so you'll have to touch up -- and that's more difficult with stain. I'll stain the whole thing without the slats attached for the shelf so everything will be easier to get to. (And the stuff under the counter along the back probably won't even get stained.)
The sinks were supposed to arrive yesterday but are delayed. I was hoping to show you what it will look like with those but we'll all have to wait. ;) I'm already on the look out for baskets that will fit on the shelf -- there's a ton of space under there!:
There are things to consider if you decide on this type of bathroom vanity:
- You can do a stone top, but would need to add more support around the walls.
- Wood is fine on a vanity as long as it's protected well. I'll be using a heavy duty poly and lots of caulk around the sinks!
- Think about where your drain and faucet will go when you build -- leave plenty of room for all of that to come down.
- If you need to store a bunch of stuff this may not be the design for you. You'll be surprised at what you can hide/fit in baskets though!
- You'll need to go with above counter sinks if you do this design.
- Consider the height of your sinks if you go this route! Newer vanities are taller and our old one was only around 29 inches. This bathroom is mostly for our son, but he's getting taller by the day. :) This counter is around 31 inches and the sinks are around five which will be fine for him. If you have young children you'll want to go lower.
- Depending on your sink height, you'll need higher than usual faucets as well (which are harder to find).
- You may want to go with slightly nicer plumbing if seeing that concerns you. As you can see, you have to be at just the right angle to see it underneath. The baskets will hide most of it as well.
I spent $200 on the vanity and $120 on the sinks -- so I saved a TON with us building it! I can't wait to see it done! I'm hoping we'll have running water in here again by the end of this week and then I get to start on the wall behind the sink. Still deciding on the details for that part. :)
I was really hoping to be done with the room by June 1st but I think it's going to be mid-June before I finish up. There is so much detail work to finish up like trim, wall treatments, paint, and crown molding before I can call it done. I think it's going to be beautiful!
Have you ever built your own vanity to save some bucks? If you're a blogger feel free to share a link to it in the comments -- I'd love to see!

Comments
Post a Comment