Goodness! I've been so excited to share this transformation with you! It's been in the works for a few months and then the lovely folks at Kwikset asked if I'd like to share a door transformation with you and it all worked out so perfectly! It is SO GOOD!
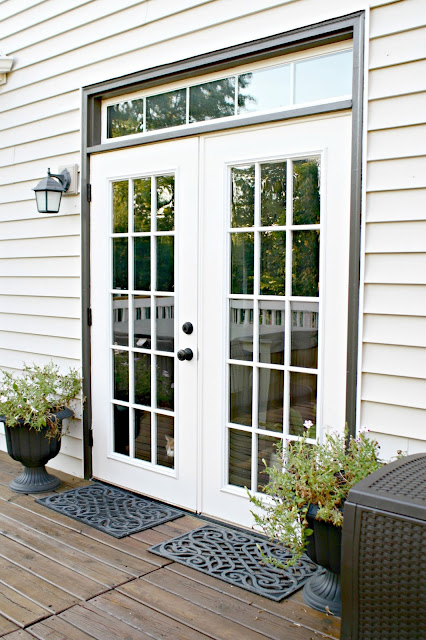
Years ago we replaced windows in our family room with these double doors:
They were a total game changer for our house. They let in so much light and make everything feel so much more open. One of our best decisions ever.
You'll notice they look like French doors, but only one side opens -- we were told that double exterior doors (that both open) can cause problems over time. This was such a great compromise. The look without the issues!
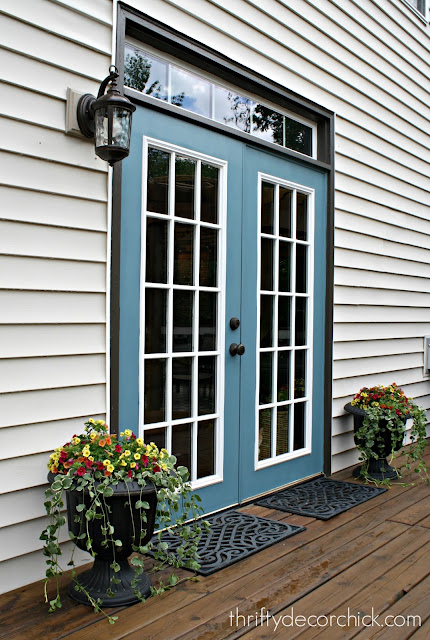
You might remember that I painted them a pretty blue last summer:
I think I told you then that I had big plans for this spot outside...I've had this in mind for a long time!
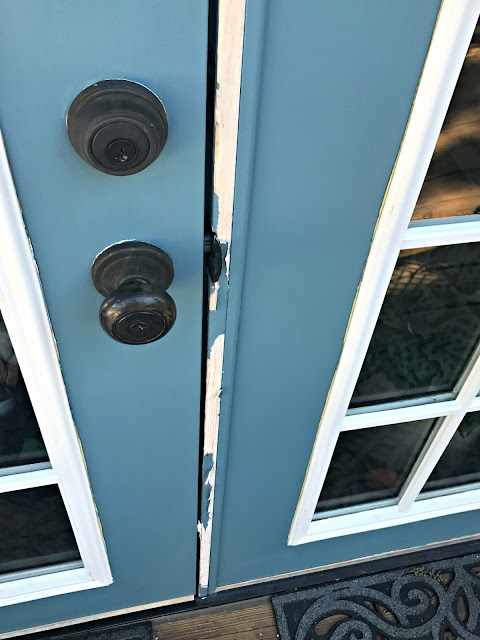
The doors have held up great, except for this middle section -- no idea why the paint started flaking but it was making a mess:
AND that hardware had seen better days for sure.
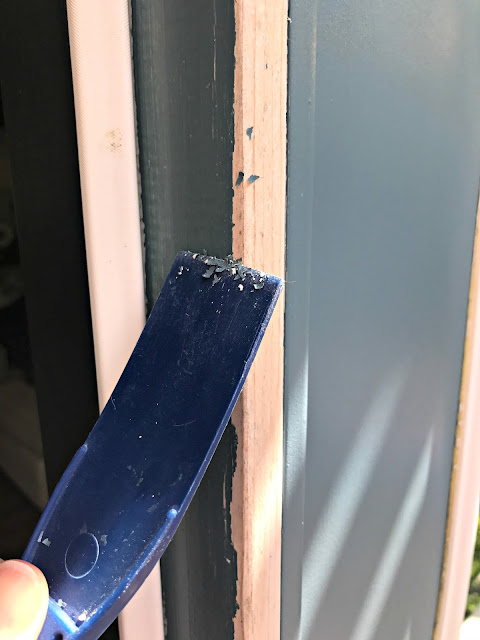
I used a scraper to take all the excess paint off before doing anything:
Then I did a very light sanding to make sure all the chippy paint was gone.
I repainted that part of the door and then tackled the hardware. I was so thrilled when Kwikset offered us new hardware for our exterior doors. One, because they were looking worn after all these years. TWO (this is the best part) -- they provided stylish and durable products with Kwikset's SmartKey security feature as well. Because I've changed out our hardware years back we were using THREE different keys for our exterior doors. It was way too much. This awesome product not only helps to protect against common and destructive break-in methods, but it also allowed me to easily change the key so that ONE works for all the doors.
Mind blown.
But first, more about the pretty hardware. 😍 There are a few DIY projects that I know people avoid because they seem too difficult. This is one of them -- but I think it would surprise you how easy it is to change out both interior and exterior door hardware.
For the knob you just unscrew the hardware and pull it apart. Then replace it with the new version and match up the screws to the holes inside. It's pretty easy!:
Looking better already, right? If you paint your doors you really should take the hardware off -- it's really not that bad! I've learned from experience that you'll kick yourself for not doing it if you ever change your knobs later.
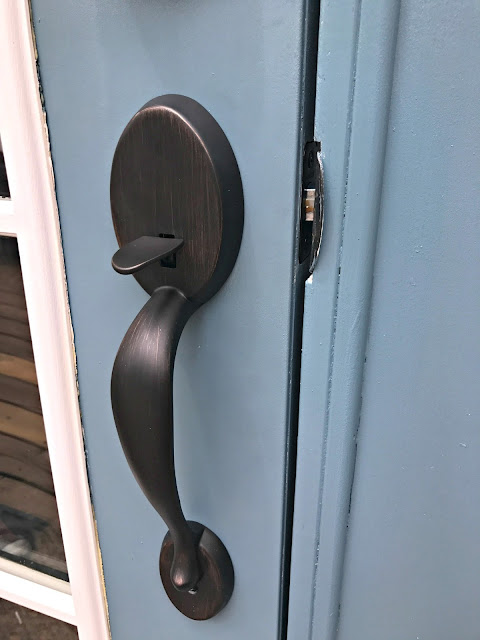
Because I was changing this out from a knob to this nicer handleset, I only needed to add one hole at the bottom to screw in the lower part of the handle. I just used a drill bit to drill through the door and then screw it in.
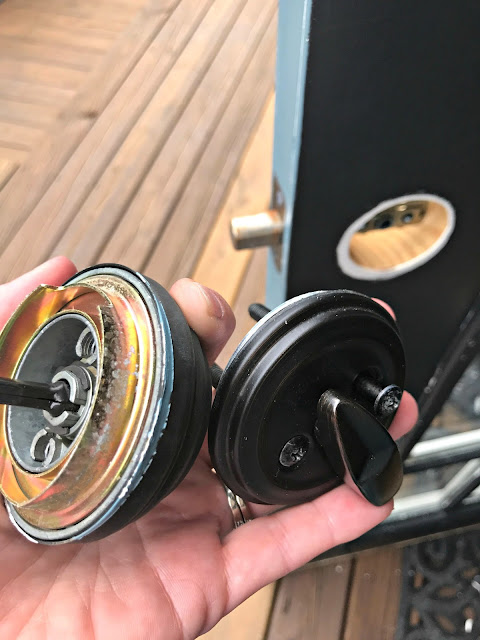
For the deadbolt it's not much different -- their instructions cover every single issue you may run into. Again, you need to just unscrew the two pieces and take them off of the door:
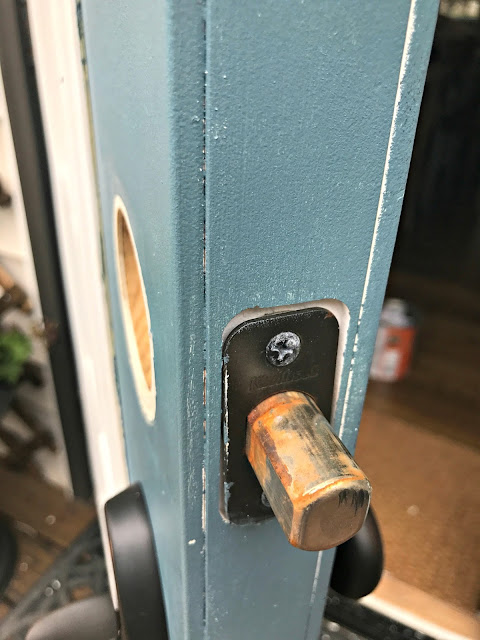
Then you'll need to replace the deadbolt part. Just remove the two screws and pull it out:
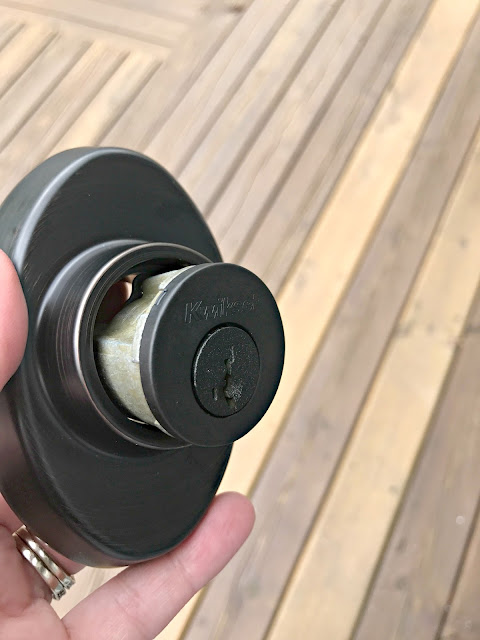
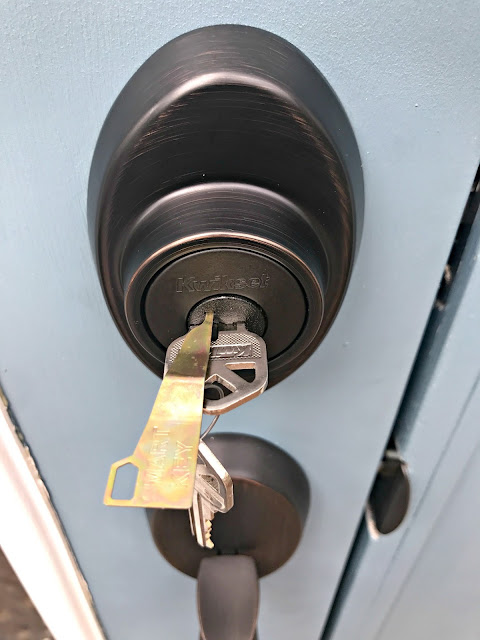
This is the Smart Key awesomeness I was telling you about earlier:
More on that in a bit!
The Kwikset SmartKey product offers better security because of their unique design that protects against lock picking and lock bumping -- I had to look up that last one. There's been an increase in those occurring in home burglaries.
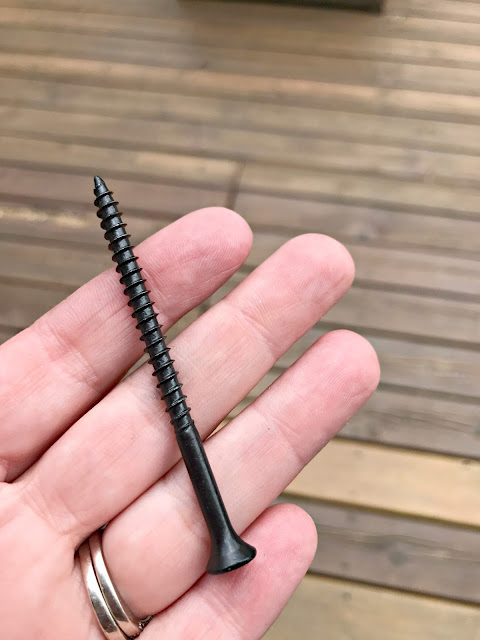
I also love that they provide the really long screws that you should use to secure your deadbolt plate to the door frame:
The longer the better for these!
The lock part goes together like the bottom -- you match up the insides and then insert the screws to pull everything together. (More on that in a bit!)
But this is the best part...they provide this little tool that allows you to re-key each lock to work on the same key. You follow their very short instructions with your old key and the new one, and insert this into the little slot:
And presto! Your key works on ALL OF THE LOCKS. Hello! I cannot tell you how nice and convenient it's been to operate with one key!
I was able to change out our front door hardware as well -- and followed the same process. There are a couple little tricks the Kwikset hardware offers that I wanted to mention because you may need to know these if you tackle this project.
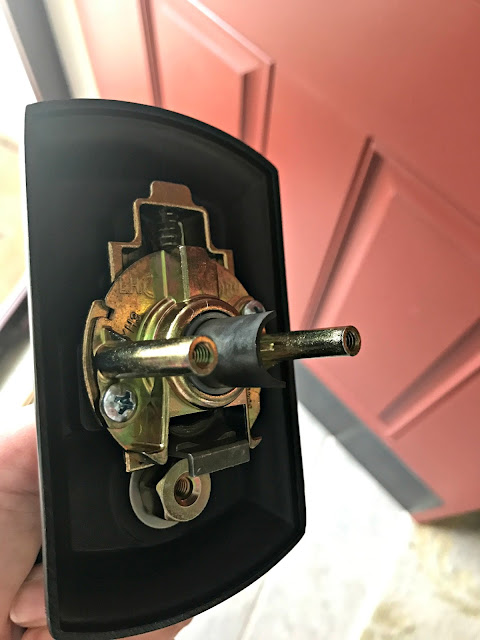
When you fit your two pieces together on the door (front and back), there's a half circle metal piece that inserts inside the door. If you've ever installed hardware you know what I'm talking about. You can see it here:
If your hardware has this section facing the other way the fix is EASY -- you just tug on that half circle metal and then twist. It flips over to the other side. Takes two seconds. Brilliant.
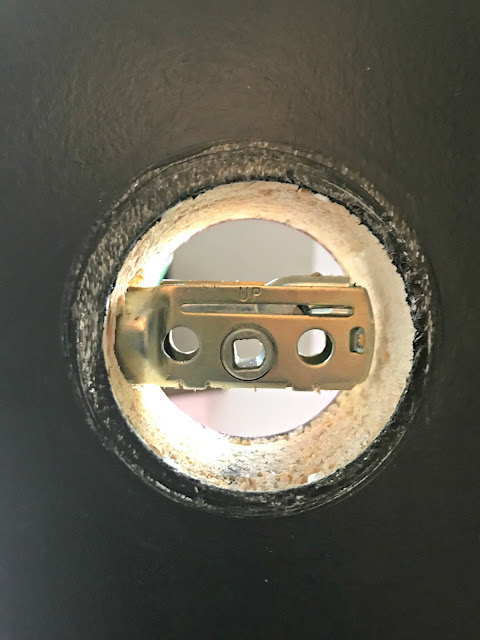
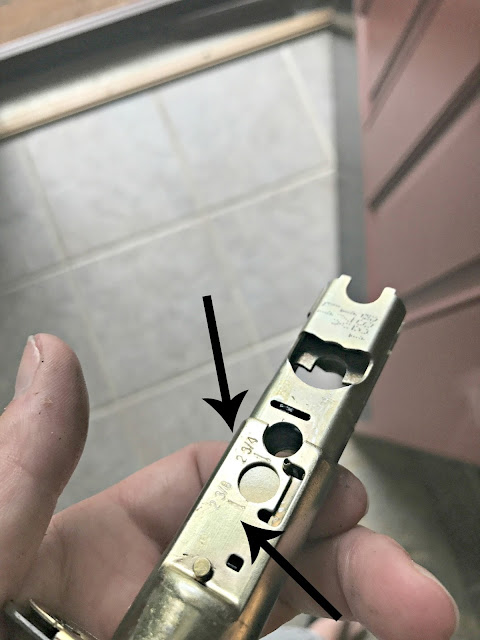
This next one is awesome. When you install your new deadbolt or door latch, you'll want that hole in the center to be in the middle of the circle:
If yours isn't centered this fix is easy too.
You just press down the little buttons and slide it to the length you need:
It was at 2 3/8 and I needed it to be 2 3/4. Again, so easy!
I was able to switch out all of our doors in about 90 minutes. It worked so well and I'm still geeking out at how pretty it looks. (And...ONE key.):
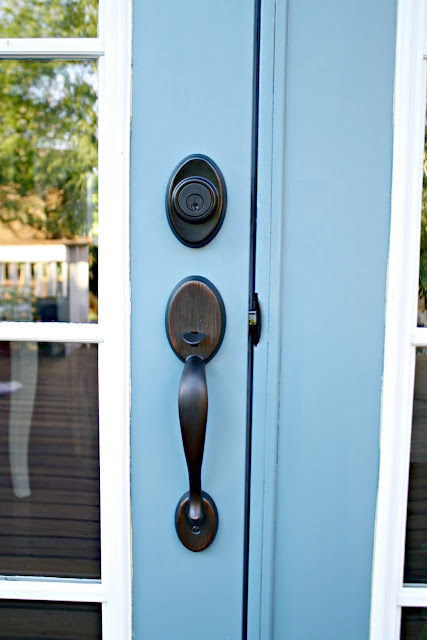
I used the Chelsea handleset for this door and this Avalon set for the front door -- both in the Venetian bronze finish.
Remember -- when you install hardware the screws always go on the inside! :) This goes for in the house too. You want to make sure you can use a screwdriver from the inside if you're ever locked in a room for some reason.
OK! Now for the transformation I couldn't wait to share with you! I've always wanted to do this, but when we finished the pergola last it was decided it would happen. We just weren't sure when.
The back of our house is all vinyl so I've always wanted to break it up a bit (see the before pics above). The double doors helped a ton, but I knew this would make an even bigger impact. I'm obsessed. :)
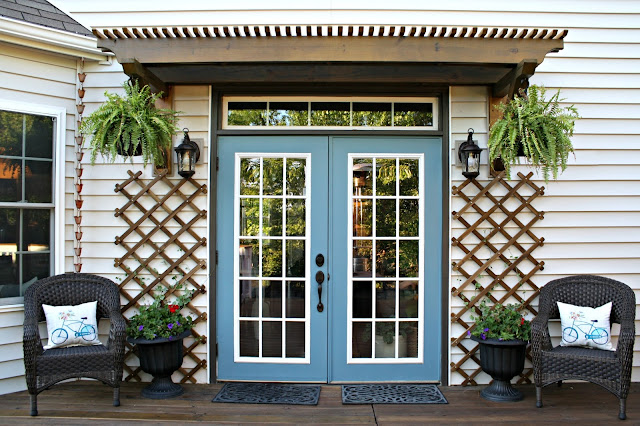
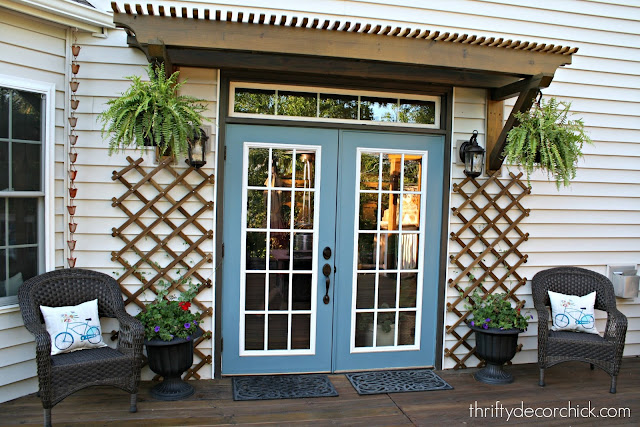
Check out those doors now!:
Holy cats, isn't it beautiful?? I've been dying to show you!
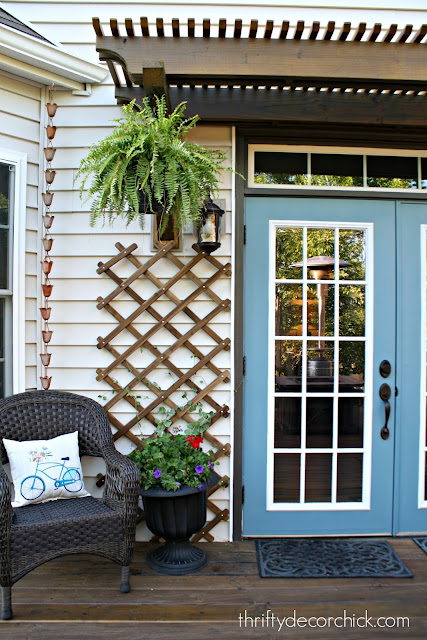
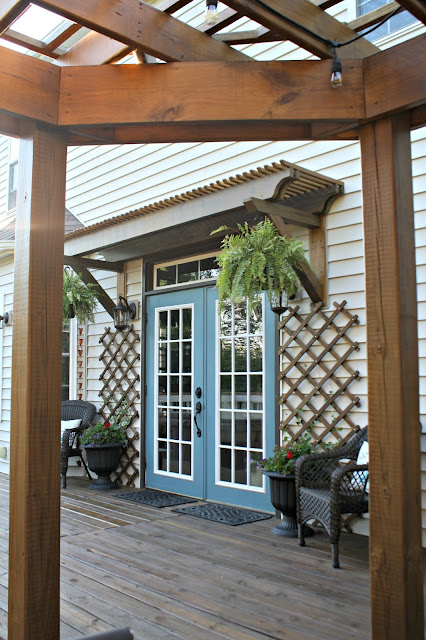
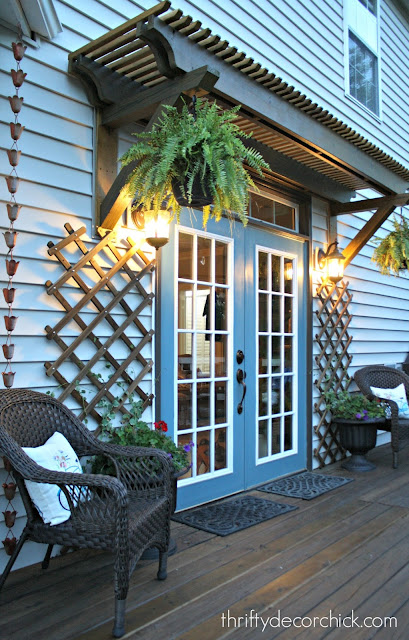
It all came together so beautifully. We had the trellis built over the back door to match the pergola -- it's a similar design but simpler.
Our door opens out (something else I'm so glad we did) to save space inside. It's not been a big deal at all, but we knew from the start we'd want to add a little something over the door eventually. Not a roof, but just enough that it would provide some cover from rain and block some snow from falling right there.
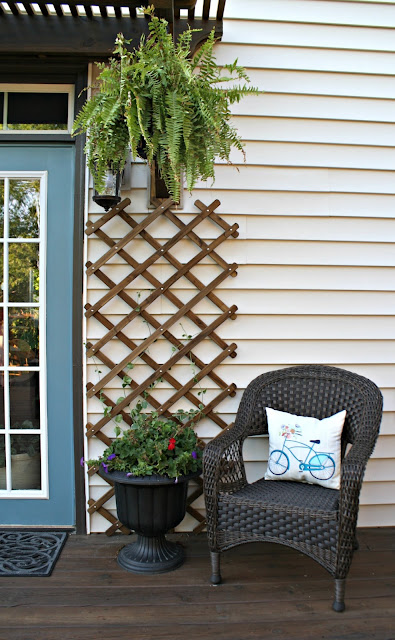
This has helped already! And it looks SO good. On our RV trip a few weeks ago I ran into an IKEA and found these pretty trellises in their outdoor section. They match our stain perfectly!:
I've had the pots for years -- I spray painted them a couple years ago to give them new life and it's held up great. And aren't those pillows perfect with the door color?
I picked up the chairs from Meijer on clearance for another spot and then put them on each side. My mind needs symmetry...it is my friend:
It really helps to break up the expanse of vinyl on the house. We just adore it.
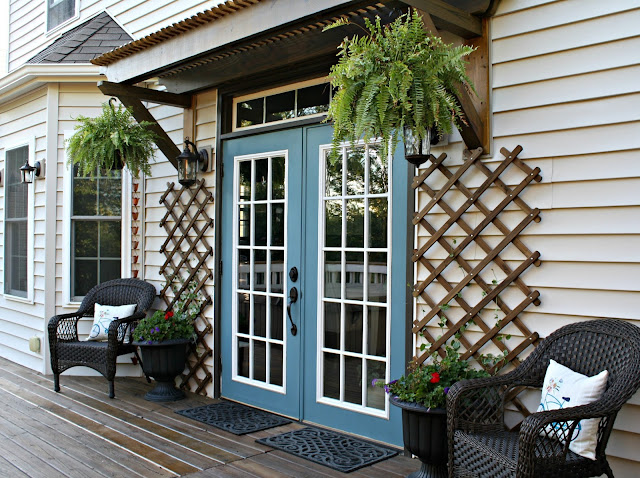
Our son said it looks like a place in the Bahamas and I just love that! ;) You can see that I strung some vine through the trellises -- I'm hoping they'll take to it and keep going! How pretty will that be?:
It ties in so well with out pergola design:
Here's another before pic from last summer:
And here's how it looks now:
Gah. I just love it. The expanse of vinyl has been broken up just enough.
It took a few months to pull it all together but I'm so happy with it. It's just beautiful. And the new hardware is like pretty jewelry on the door -- it makes it feel like so much grander of an entrance.
Here's a look at night -- we love sitting out here in the evenings, and during the day this provides plenty of shade so we can sit out here and enjoy the space then too:
Thank you to Kwikset for the hardware -- I can't recommend that Smart Key feature enough. If you ever lose your keys or they are stolen, this makes it easy to re-key the lock in just seconds. I couldn't believe how easy it was.
The kind folks at Kwikset are offering their Juno knob and deadbolt combo pack (with the SmartKey) in Venetian Bronze to one of my readers! If you'd like to be entered just leave a comment here! We'll have it sent out to the winner. (Deadline to enter is noon EST on Wednesday, July 5.)
I've been dying to share this one with you! I hope you enjoy it. If you have questions about anything feel free to ask!
This post is sponsored by Kwikset and they provided the hardware I used. All opinions are my own and I only share brands that I know and love with my readers.


Comments
Post a Comment