This art project is one of the most fun I've tackled so I had to share it with you! The basement in this house is much bigger than our old one, which is one of the aspects that really made us fall in love with this home. We're basement people, we just love them!
So anyway, we have a space down there that we turned into more of a kid area and it's been WONDERFUL. All the toys, Legos, video games stay in this spot. Somehow Nerf bullets keep finding there way all over. ;)
I really want to make this area a cozy and fun spot for our son and his friends. This where all the sleepover happen so they are down there a lot. I did an Instagram collaboration with a company a few weeks ago and love how this turned out so much, I wanted to share it here too. This post is not sponsored -- I was so thrilled with the product I wanted to show you. I like sharing quality products and companies! Nations Photo Lab is a canvas company and they offered some free large canvases -- I knew right away I wanted to use them in that kid space.
I want to make this a space full of things that our boy loves, so I gathered all of his favorite things -- specifically Nerf bullets, basketballs, Legos, music items and finally...Fortnite. 😆 (For those of you who don't know, it's a video game that is ALL the rage right now.)
I put the items on a poster board on the floor, then stood above and took pictures. They turned out SO cool and he was thrilled. When I sent them off to be made, I expected them to be similar to flimsy canvases I've seen before -- stretched across a frame.
When these arrived in the mail (wonderfully packaged by the way) I was THRILLED with the quality. The canvases are stretched over what I'm assuming is wood -- so they are solid and substantial:
They are not flimsy at all -- I didn't feel like I needed to baby them. Each print came with hanging wires already installed on the back too.
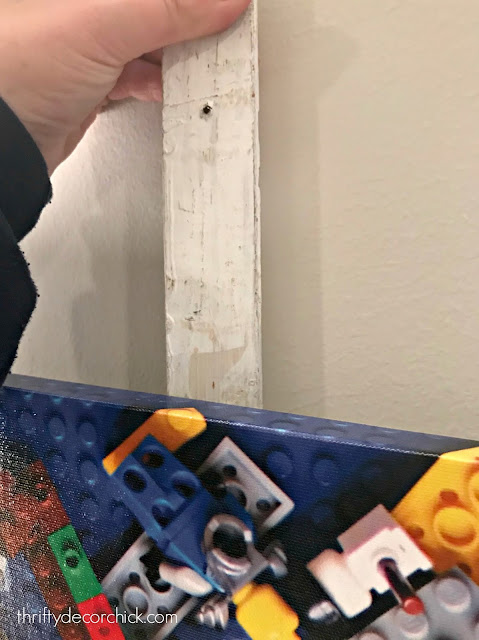
I have a tip for hanging anything with wire -- and it will save you SO MUCH time and effort!! Just take a piece of wood -- I use a paint stick. Insert a screw into the wood anywhere, I usually go lower but it depends on the art and where you're hanging it:
Then you'll "hang" the art on the screw head:
Hold up the art by the wood and when you find exactly where you want it, push into the wood so that the screw leaves a small hole in the wall:
To get it super exact I would suggest using a short screw -- that way you can hold the art up very close to the wall to get it just where you want it.
That hanging method helped a ton for the layout I decided on! Here's how it turned out:
We just think it's SO fun and our son is so tickled by it. It really meant a lot to him that I used his favorite things. His buddies all comment on it too -- it's the cutest thing ever.
I also hung the EKET boxes from IKEA along the top of the wall. Once I figured out how to hang them that part went really quick:
I wanted something to display his Lego sets that would be somewhat protected from dust and would keep them away from small hands.
I think eventually I'll add more boxes across the top -- we'll see! This spot makes us smile and the prints are so bright and colorful. I'm super impressed with the quality!:
Have a GREAT weekend my friends -- I'm thrilled because it's finally going to cool down (for good??). Fall is here!!!


Comments
Post a Comment