This quick project goes to show how much money you can save when you DIY. Even I will buy rather than do it myself often, but this one there was just no question. I saved a ton, even comparing to less expensive options!
I know DIY scares some of you but this one is about a two on the do-it-yourself scale. ;) I was looking for one of those butcher paper holders that are so cute -- you can pull the paper down and write lists or meals for the week.
I wanted to hang it in our pantry:
We have the big blackboard nearby in the mud room, but I wanted something I can tear off and take with me if needed. Scratching things off a list is my favorite. :)
I searched online for something to buy, and found one I LOVED...for $150. ONE HUNDRED and FIFTY. Nope. I kept searching and of course found others that were less, but they were all more than I wanted to spend. It's not a super complex thing!
I found this tutorial at A Little Bit OCD and followed it almost exactly. Brilliant! I gathered my supplies:
Most if it was from IKEA -- but if you don't have one nearby check out the bottom of this post!
I used the following:
Betydilg brackets, $3 total
Raffig finials, $2
Racka rod, $2
The brown paper is from the paint aisle at Lowe's and I believe it was $4.
To cut this down to size you will need a pipe cutter. I've had this for years and use it more than I ever thought I would! You can find small pipe cutters here (affiliate) or at the hardware store. You just tighten the cutter down on the pipe and then rotate it around:
Every couple of turns you tighten it and it eventually cuts through the metal. Super easy! I showed you how else I've used it here.
I hung my brackets (using a level to make sure they were the same height) and hung my rod. Then screwed in the finials so the rod doesn't fly off:
Cute right?? Not bad for $11! If you purchase from IKEA makes sure you get the smaller (diameter) Racka rod. Anything bigger wouldn't have fit through the paper roll. And I'm laughing at our list right now...I swear we eat real food. 😂
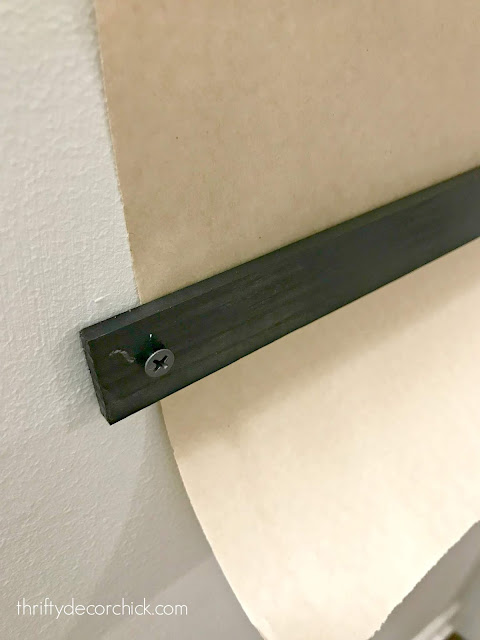
The one thing I added that the original tutorial didn't have was a bar across the bottom to hold the paper against the wall. The expensive version I saw had a metal piece that you attach.
I just grabbed a scrap piece of wood, spray painted it black, then hung it on the wall:
What you don't see here is I put two washers behind the wood so it sits away from the wall just a bit. That allows the paper to move freely.
We have a Sharpie marker that I'm going to hang off one of the brackets so it's right there when we need it.
I'm able to just pull it off and it makes a clean cut. I LOVE it!!:
The best part is these brackets are adjustable so if I use a thicker roll I can move them away from the wall a bit. If you don't have an IKEA nearby just look for similar brackets that you can move. I found some here and here!
Cute right? Functional, easy and cheap too! My favorite combo. :) Have you tried making one of these wall mounted paper holders?
Some affiliate links included for your convenience!


Comments
Post a Comment